
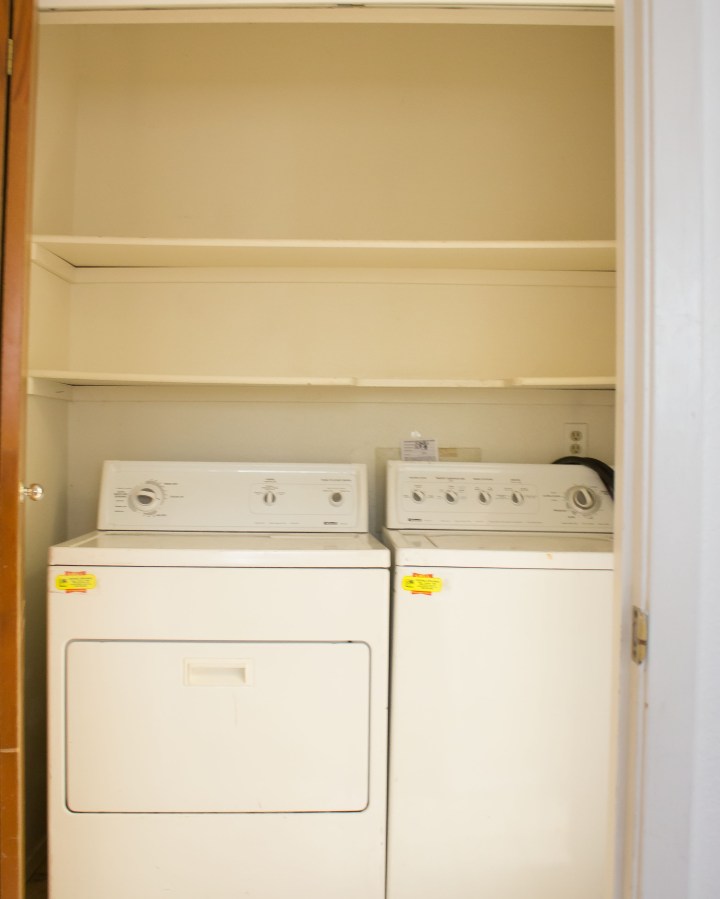
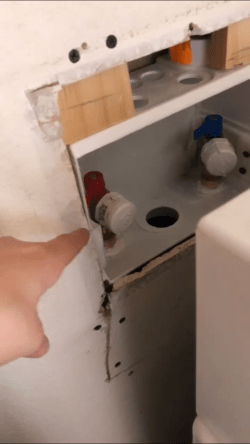
The room I thought I would finish last in my home remodel journey ended up being the first to be done! When we went in to plug everything in we found that since the house had been winterized for a while the wall faucets were leaking. So we ran to Lowe’s only to come back and find that they had been soldered on. We had to cut a hole in the wall and cut through old piping and redo the whole hook up.
Once we got the plumbing all sorted I decided to rip out the bottom shelf and float out the back wall to prep for wall decals. (Meaning I took dry wall mud and spread it across the back wall as flat as possible, after it dried I sanded down the wall and repeated the process until all the texture was gone and the wall was smooth.)


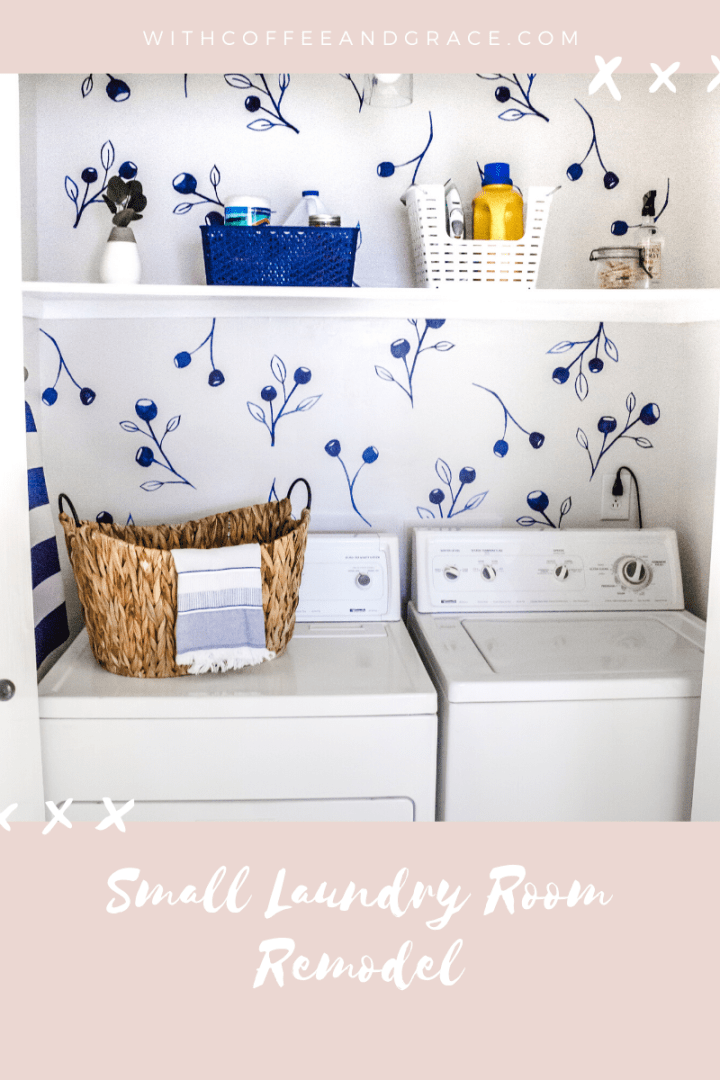
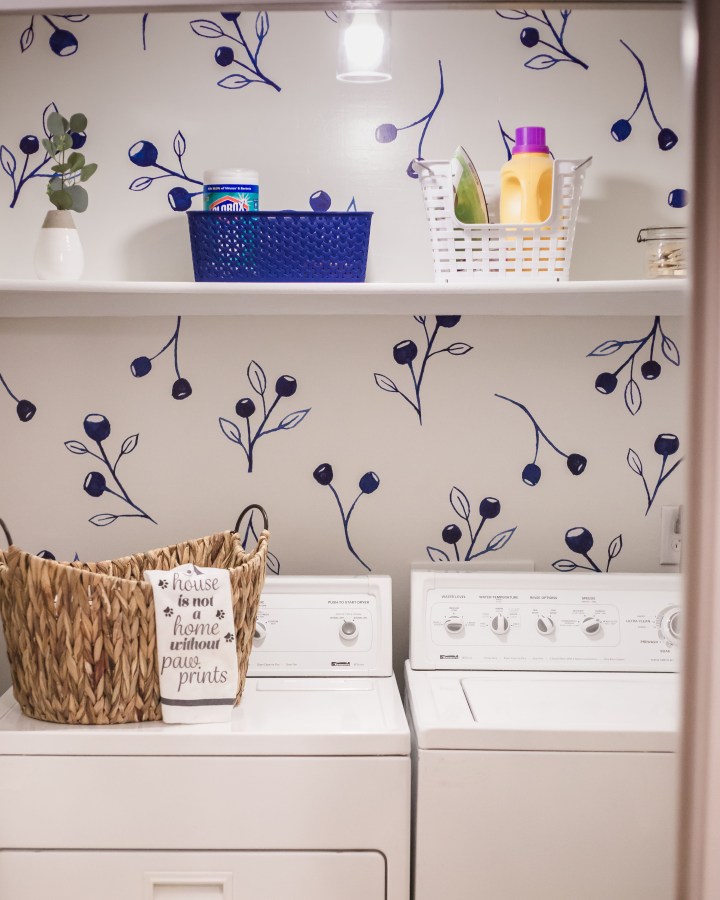
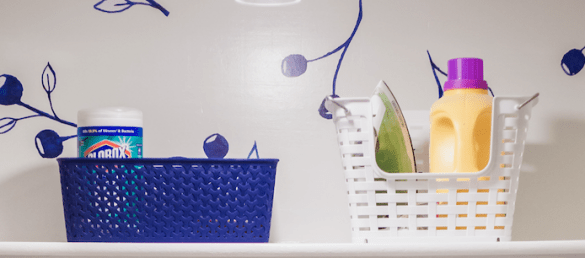
My favorite tip: I didn’t have the budget to buy a new washer and dryer. The ones the house came with were in pretty rough condition. So I bought Appliance Epoxy from Lowe’s for $4.48. Making the appliances look new!


Next I painted the doors and trim white, then spray painted the hardware with oil rubbed bronze for a deep contrast.


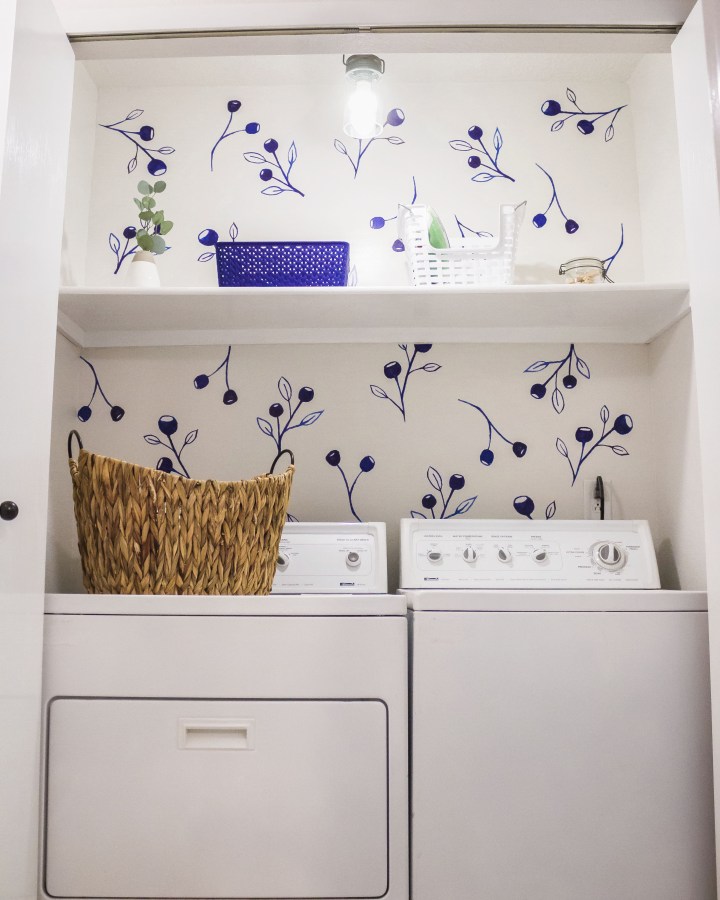
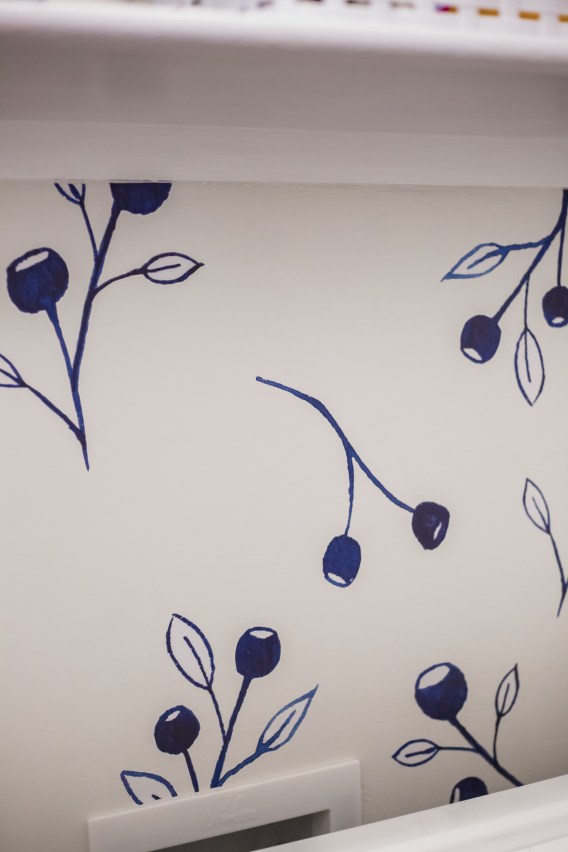
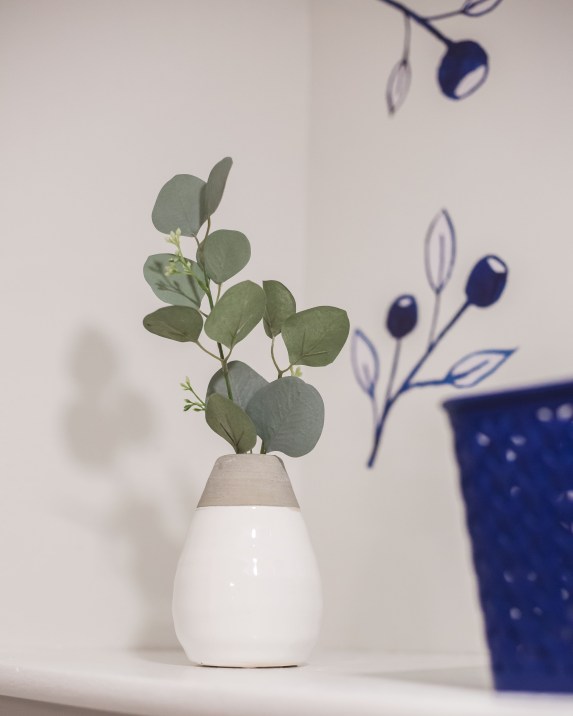
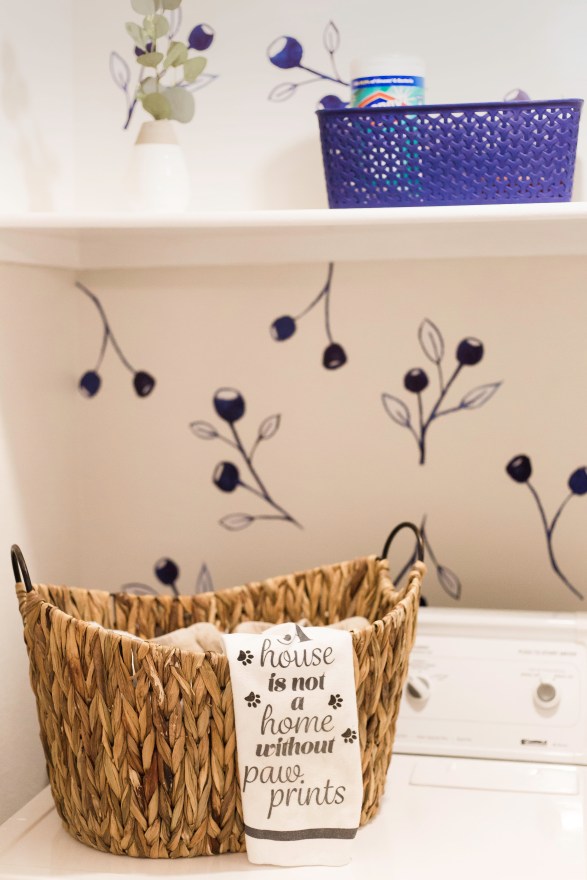
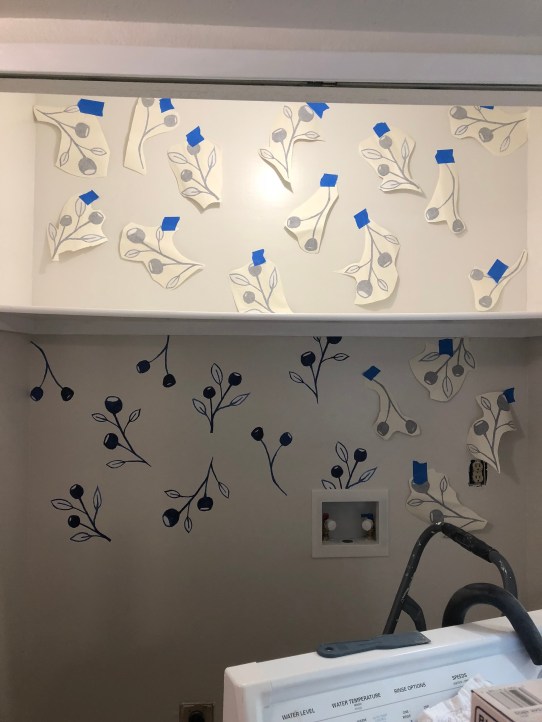
Finally it was time to paint! I had Lowe’s match Silver Satin by Benjamin Moore and used it for the whole room. After painting I was able to add my favorite part! I ordered the Budding Blues water paint decals from Urbanwalls. I LOVE these decals and believe they made a huge transformation to the room! The process was SUPER easy to apply as well. I started off cutting out each leaf and separating them to the different styles.
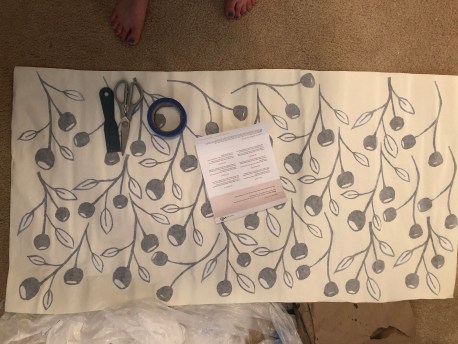
Then I took small pieces of painters tape and started taping each piece up and adjusting placement as I went. Once I had all the leaves up where I wanted them. I took off the white backing and took a plastic putty knife to make sure it was applied evenly to the wall, and then peeled back the top film.
The last steps were changing outlet covers and the broken light fixture. I chose a light Pendant by Allen and Roth.


I actually was kind of thankful to have this room end up needing to be done first because it allowed me to have a check marked off. With so many different projects going on all over the house it was a small success story and gave me a glimpse of what the house will be able to look like! And I could learn and make some mistakes on a smaller room that can ultimately be hidden away.
Fun Fact: When we went to plug in the washer and dryer at finish we found out the washer didn’t even work 😂 But God is so good! My parents had friends the day before ask if they knew anyone that needed a washer. When they arrived the next day the washer they brought was the exact same one! I was just thankful that I would FINALLY be able to wash clothes and Jesus hooked me up with a set that still matched. It’s fun to watch God’s hand in all of this too!
I had way to much fun with this room and hope it can inspire you too! Don’t forget to let me know if you use the Budding Blues in a project you do! I would love to see your ideas!
With Grace,
Carissa

It looks clean and fresh now! Great job! I’m so impressed you did the work yourself! The decals make it super cute! It’s a lot of hard work, but it is so much fun to see a space come alive, isn’t it? Have fun 😁
LikeLike
Thank you!! Yes so rewarding to see it all come together!!🙌🏻
LikeLike
You’re AMAZING! I can’t believe all you and your Dad did together!
ABSOLUTELY beautiful!
LikeLike